Here are the previous posts in the "Practical Git For Beginners" series.
In the previous posts, you learnt about:
- What Git is
- What GitHub is
- How to create a git repository
- How to create a commit
- How to edit a commit message
- How to view the commit log
- How to reset the git history to a particular commit
- The best practices for creating a commit
In this post, you'll learn about the basics of branches in git.
What is a git branch?
In Git, a branch is essentially a snapshot of your codebase at a specific point in time. It is a pointer to a particular commit that serves as the base for creating new commits.
In a fresh projects, the default branch is the main project (or master in older projects). When you create a commit on the main branch, each new commit sits on top of the previous commit thus building a "linear" commit history.
Suppose, you want to work on two simultaneous versions of the same project. Maybe you want to work on a experimental feature but you don't want to risk ruining the present state of the project. This is where branching becomes helpful. Git allows you the branch off your history and create a new version of your project at any point in time.
Each branch can have its own set of changes and can be worked on independently of the other branches. This makes branching an important feature in Git as it enables developers to work on different features or versions of the codebase concurrently.
Creating your first branch
The main branch acts as the backbone or the trunk of your project. It's the source of truth for all developers in the team. The version living on the main branch is the one released to the end users (usually).
To create a new branch from the main branch, you can do git branch <branch-name>.
git branch devThis does not automatically take you to the new branch, to do that you can use git switch <branch-name> or git checkout <branch-name>.
> git switch dev
Switched to branch 'dev'
> git switch master
Switched to branch 'master'
You can also use git checkout -b <branch-name> to do what the above two commands did in a single command. It creates a new branch and switches to it.
You can view the list of all the branches using git branch -l.
> git branch -l
  dev
* master
The active branch will be highlighted with an asterisk.
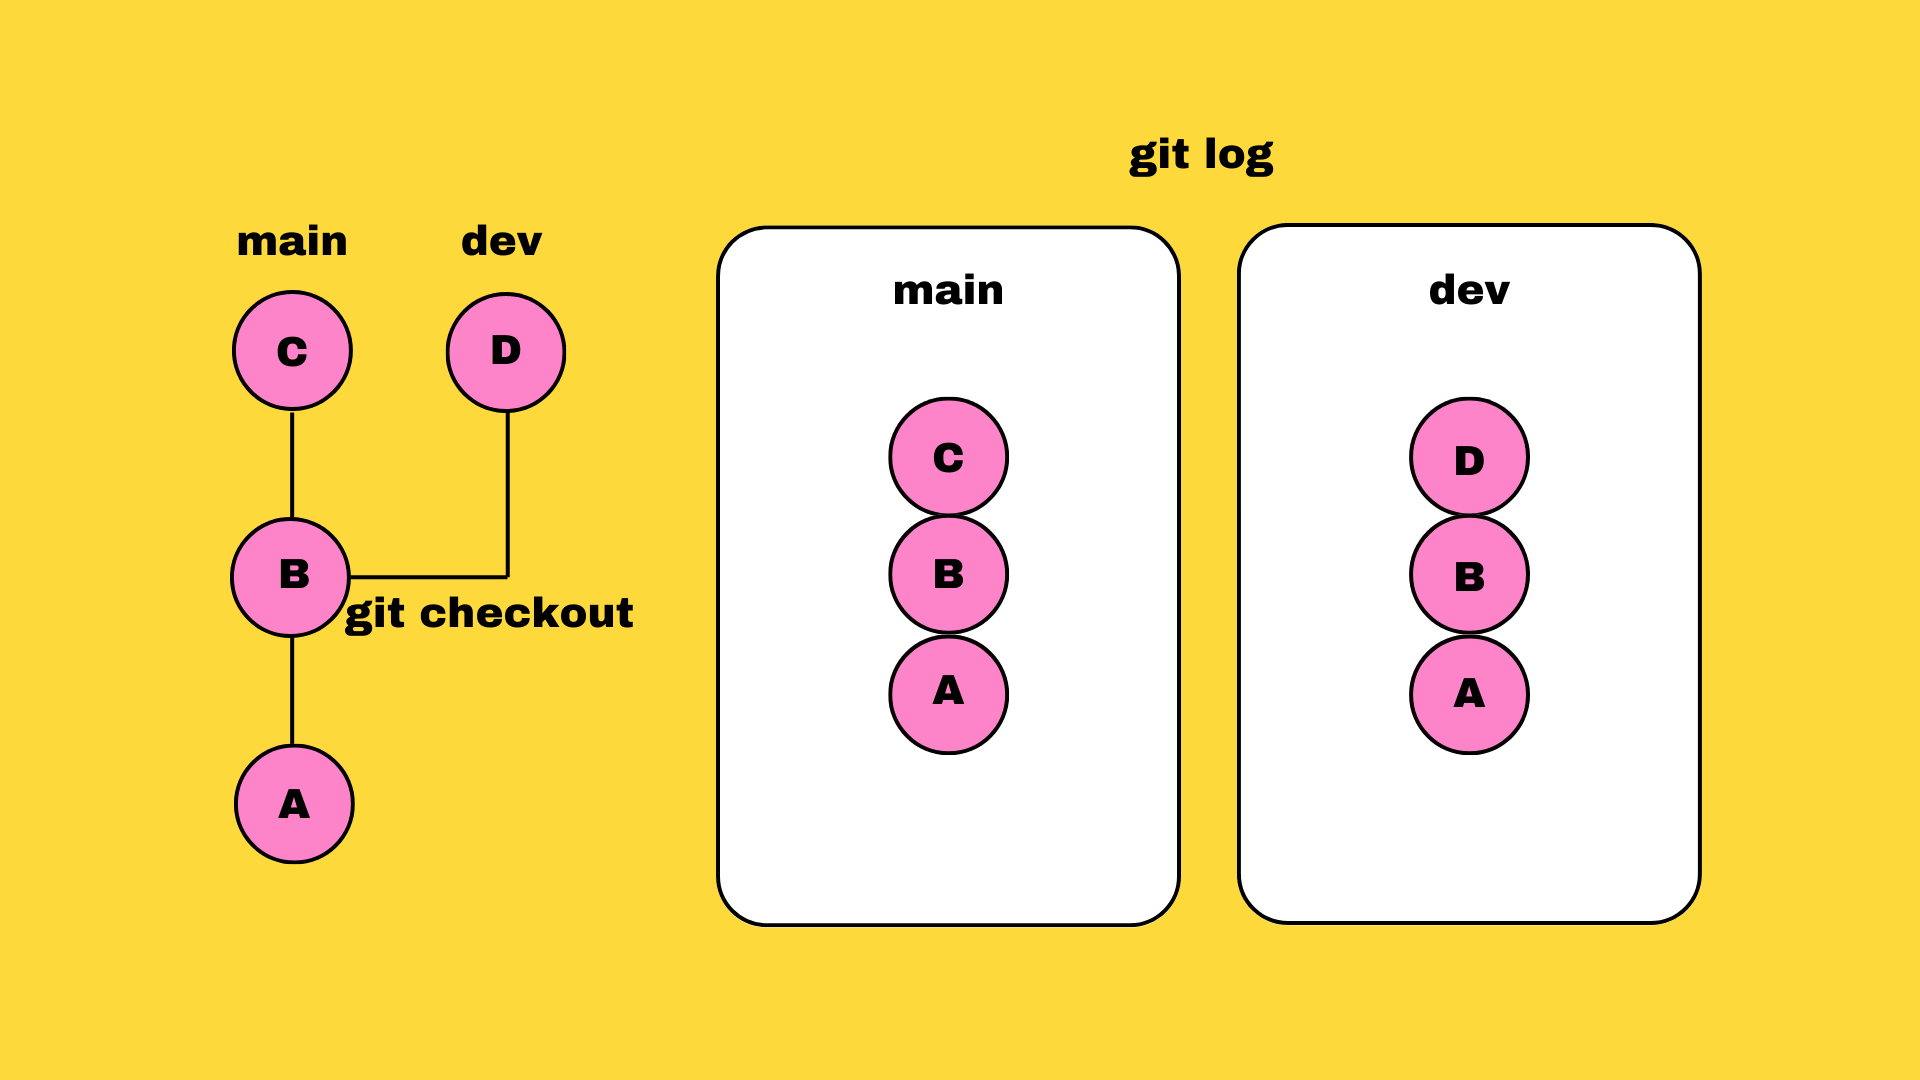
When you create a new commit on this branch, its history will diverge from the main branch.

You can continue working on the two branches in isolation. The history of the two branches converge at the base of the commit where the branch was created from.
Merging branches
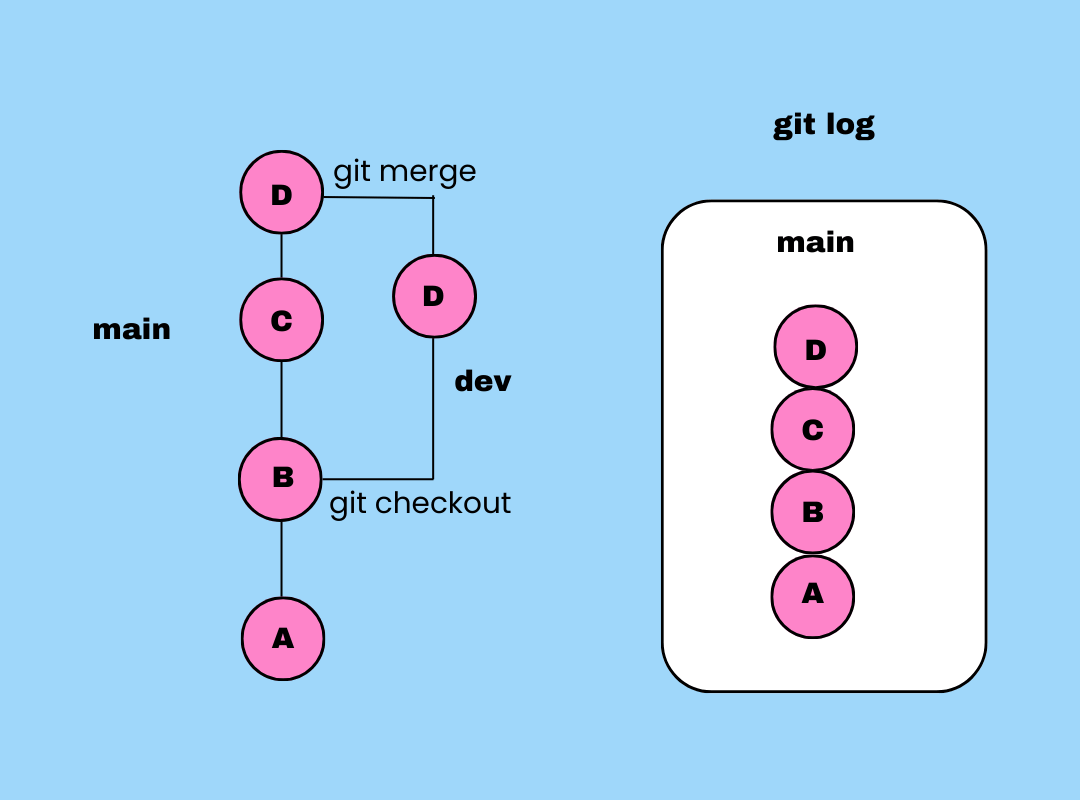
Suppose after experimenting with the new feature, you decide that you want to keep it. Once you have completed your work in a branch, you can merge it back into the main branch using the git merge command.
git switch main
git merge dev
This will combine the commits of the dev branch made after the common base commit, into the main branch and create a new merge commit in the main branch.
Or if you want to merge the main branch (source branch) into the dev branch (destination branch):
git switch dev
git merge main
Note that merge does not change the history of the source branch, only the history of the destination branch is altered.