GitHub is a cloud-based version control system that allows developers to track changes to their code and manage it across multiple users and teams. It uses Git, a distributed version control system, as its underlying technology.
Creating a repository on GitHub
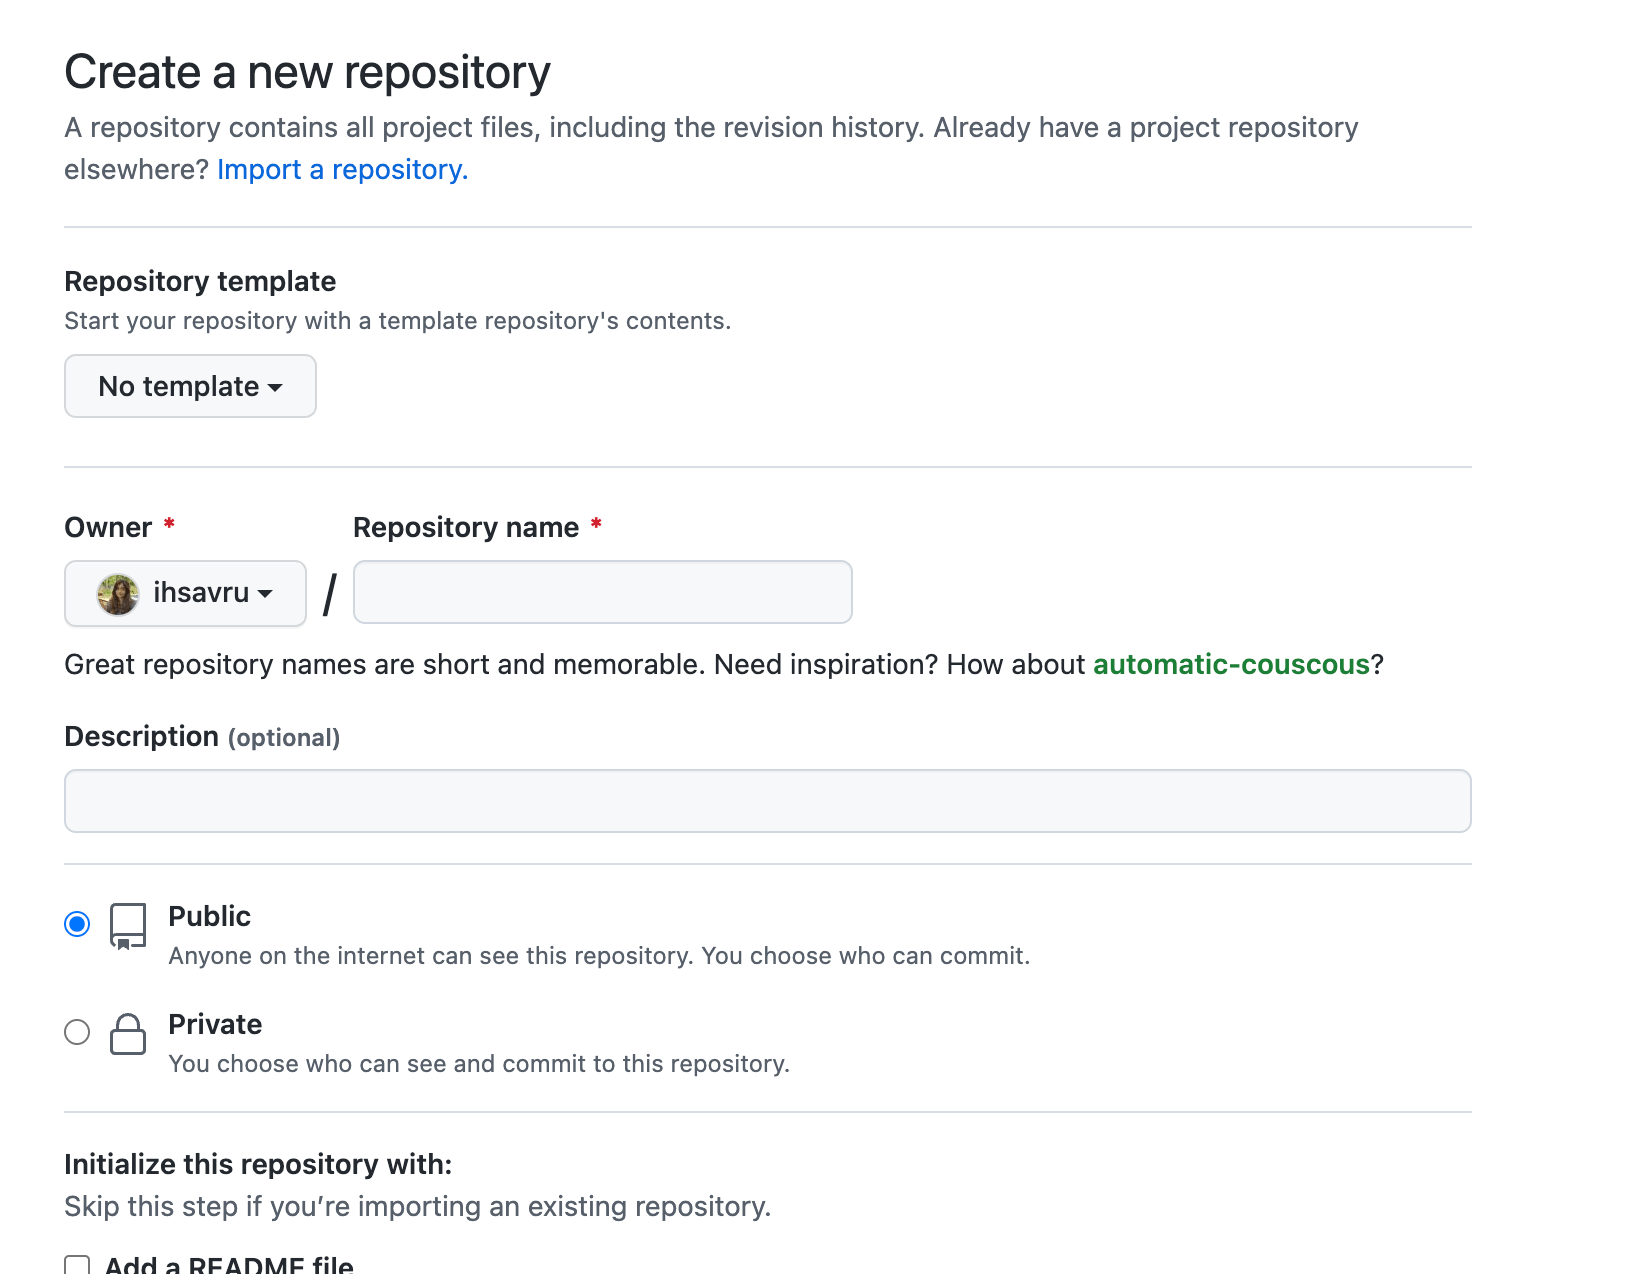
Once you have signed up for an account on GitHub, you can create a git repository using the following steps:
- Go to https://github.com/new
- Add a repository name
- Set visibility - Public or Private
- Click "Create Repository"
Development
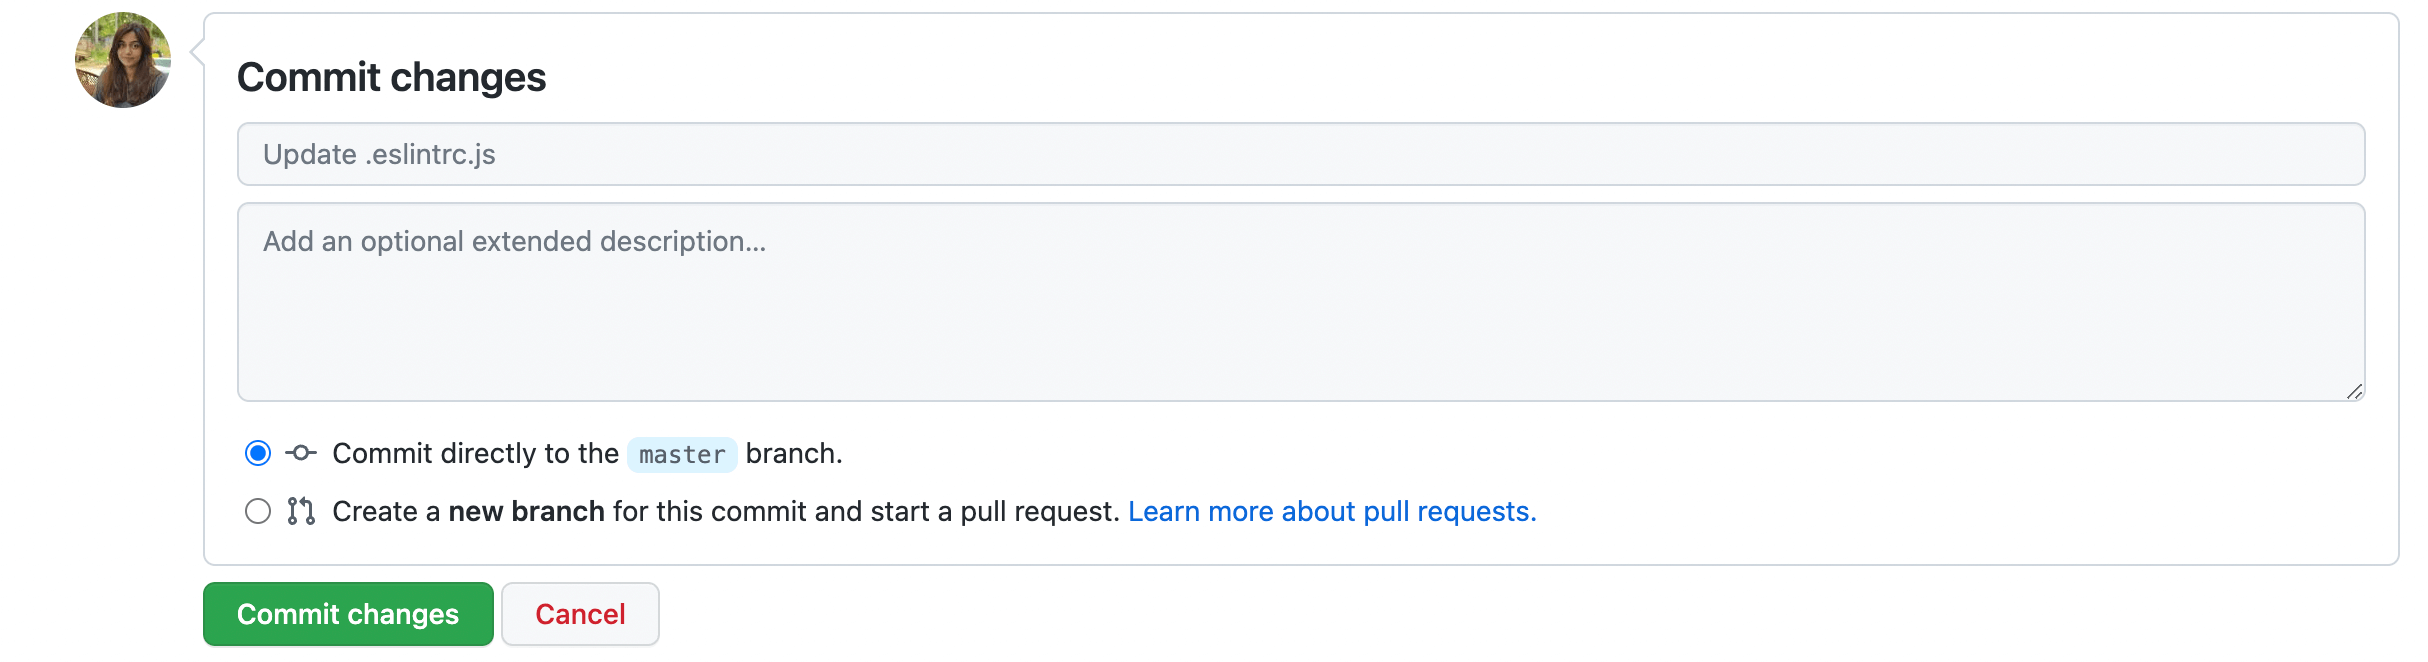
GitHub allows you to create new files on the web.

You can also edit files and create commits on GitHub itself.
But you might feel more comfortable working on a project locally on your machine. To do that you can download or clone the git repository. If you go to your repository's page, you can view the two options under the "Code" button:
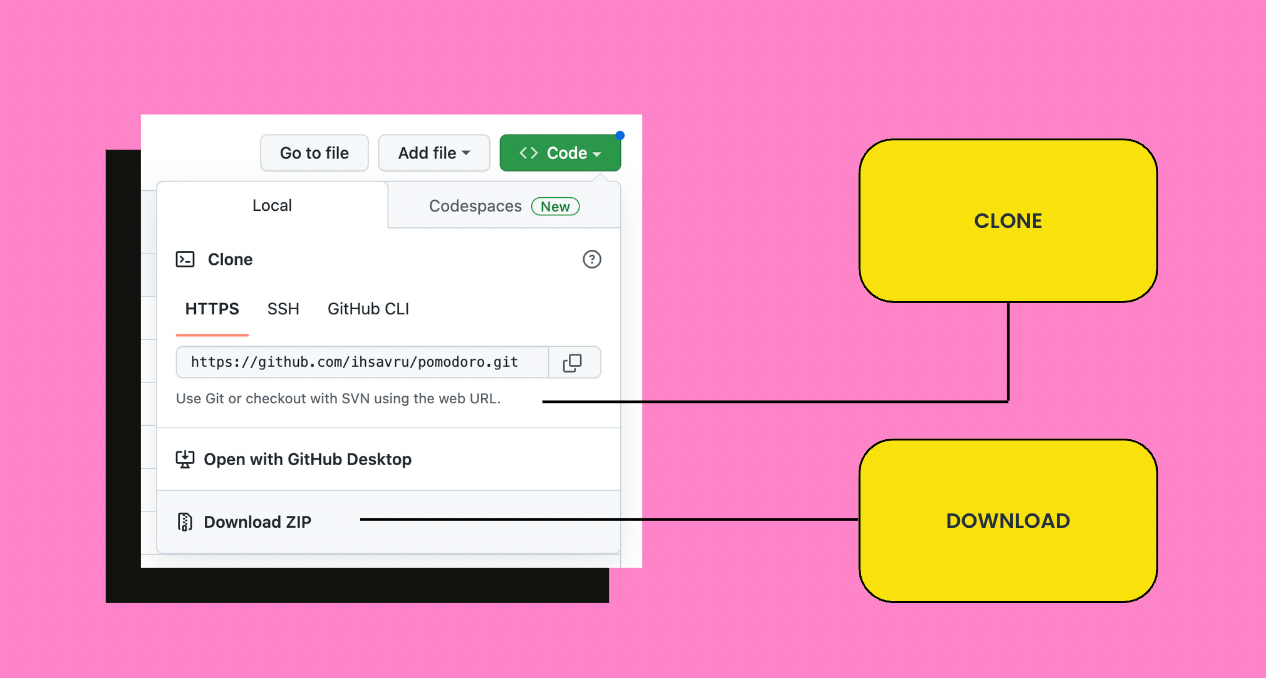
Downloading the repository downloads the contents of the repository as a zip file but it doesn't contain the git metadata i.e. the .git folder.
To download the git repository with the .git data, you need to clone it instead.
You can copy the url to the git repository from the menu option and use the git clone <path> command as follows:
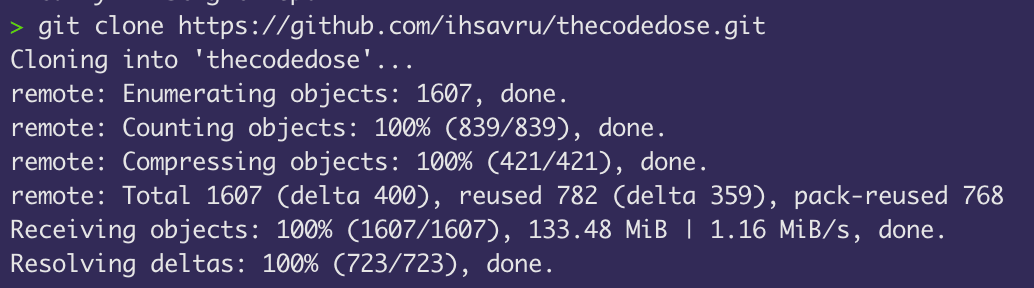
You can now make changes to the repository locally and easily sync these changes from your local computer to Github and vice versa.
Pushing Changes to GitHub
Suppose you created some new commits to the local repository on the main branch.
To push these changes to GitHub, use git push origin main.
If you visit your repository on GitHub, you'll be able to view these new commits.
Let's understand what "origin" means in the above command.
Remotes
Origin refers to a named remote. Remote repositories are versions of your project that are hosted on the internet or network somewhere. They help you collaborate with other developers who all push their changes to this common repository.
You can list all the remotes of a repository using git remote -v.
> git remote -v
origin	[email protected]:ihsavru/thecodedose.git (fetch)
origin	[email protected]:ihsavru/thecodedose.git (push)
Since you cloned your repository from GitHub, it automatically added a remote to the git repository living on GitHub.
You can create a new remote using git remote add <remote-name> <path>.
Pulling Changes From GitHub
Similarly, you can pull changes pushed by other developers to origin.
To do that, you can use git pull origin <branch-name>.
This will create a new merge commit with all the latest changes wrapped in a single commit.
> git pull origin main
remote: Enumerating objects: 34, done.
remote: Counting objects: 100% (34/34), done.
remote: Compressing objects: 100% (23/23), done.
remote: Total 34 (delta 14), reused 26 (delta 11), pack-reused 0
Unpacking objects: 100% (34/34), 18.01 KiB | 9.00 KiB/s, done.
The git pull actually does two things under the hood:
git fetch- Downloads the contentsgit merge- Merges the contents
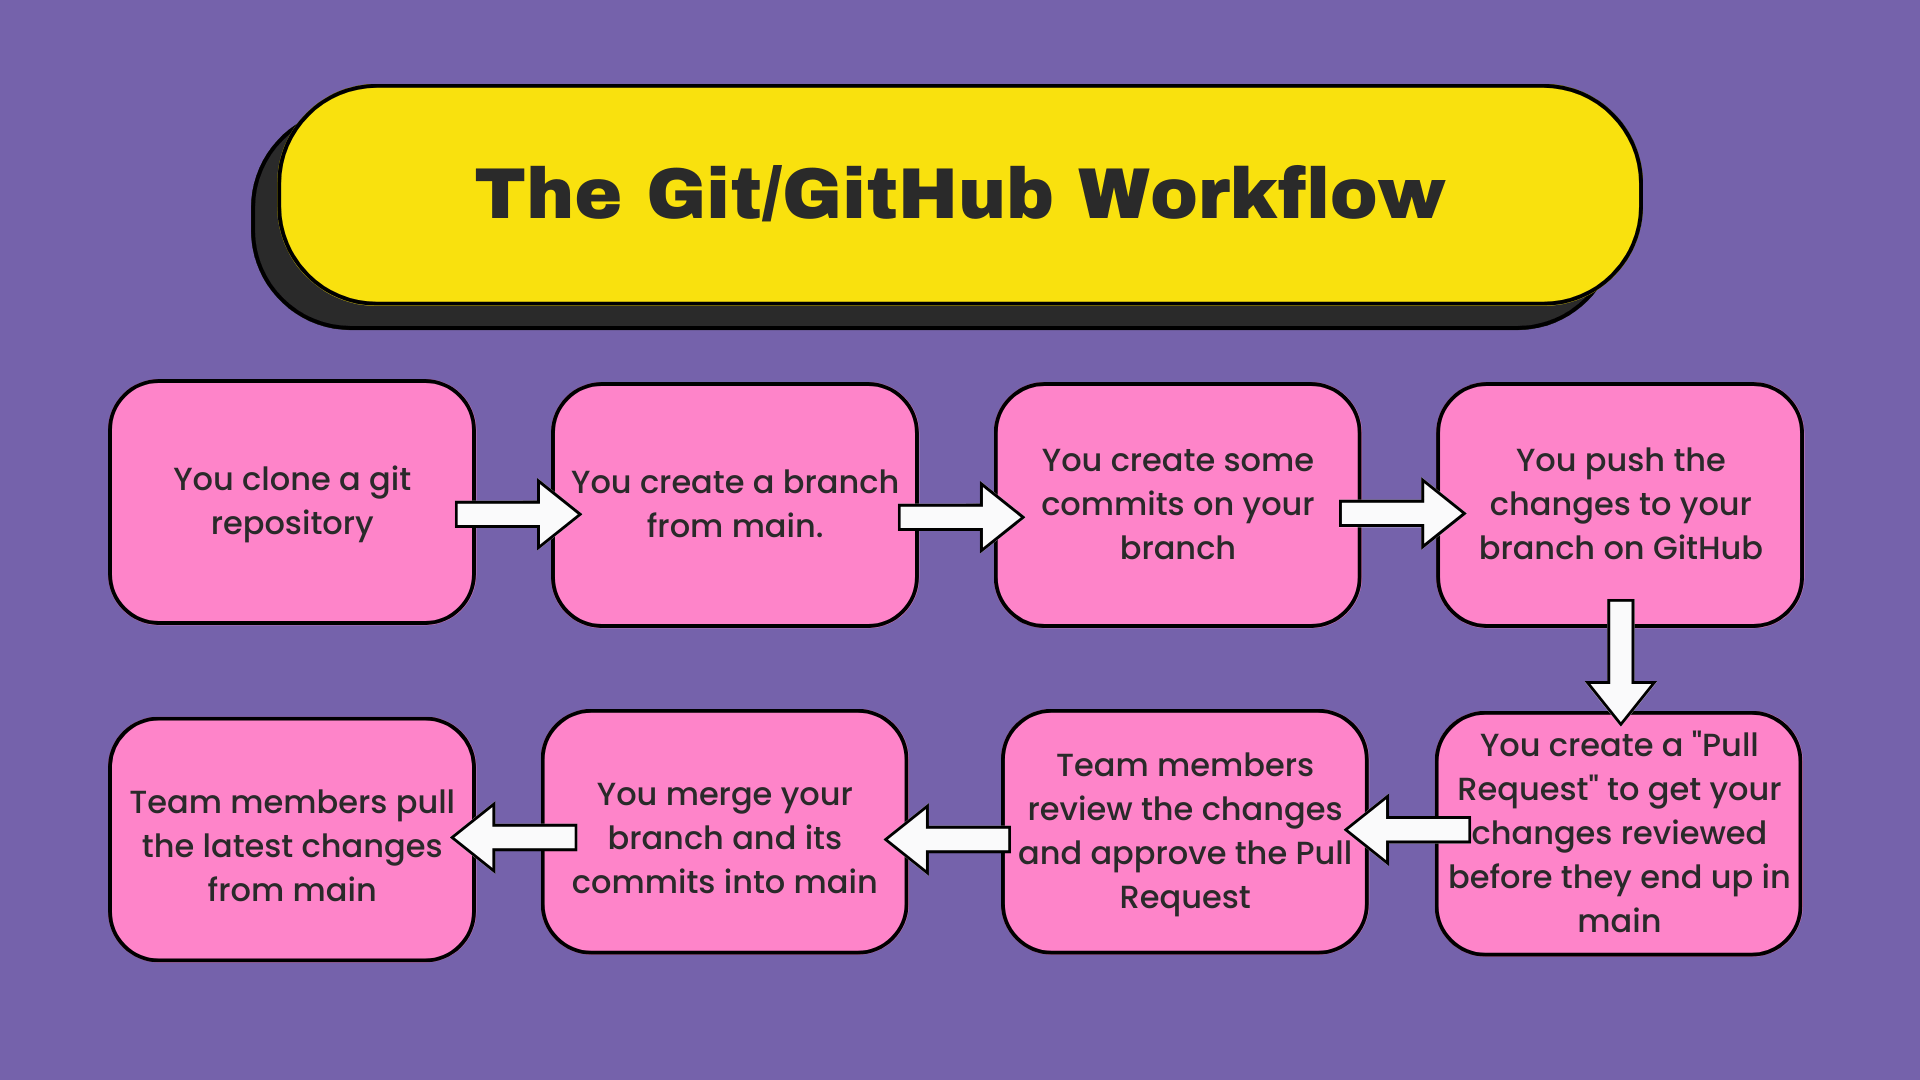
The Git & GitHub Workflow
Usually if you're working within a team, you start working locally on a new branch instead of main. This is to avoid accidentally pushing changes to the main branch without getting them reviewed by the team or messing up the "source of truth" for other developers.
Since everyone uses the main branch as the source, if anyone accidentally pushes a bad commit to the main branch, it will result in a bug in everyone's development environment hence halting the development process for the team.
After working on your branch, you can push your local branch to the origin using git push origin <branch-name>.
This means that now your branch and its commits are also available on GitHub.
You shouldn't directly merge your branch into main. You should create a Pull Request to get your changes reviewed first by the team. Pull requests allows others to review the changes before they get merged into main. To create a Pull Request you need to go the "Pull Requests" tab on your repository and click on "New Pull Request".

Then select the source and destination branches for the merge.
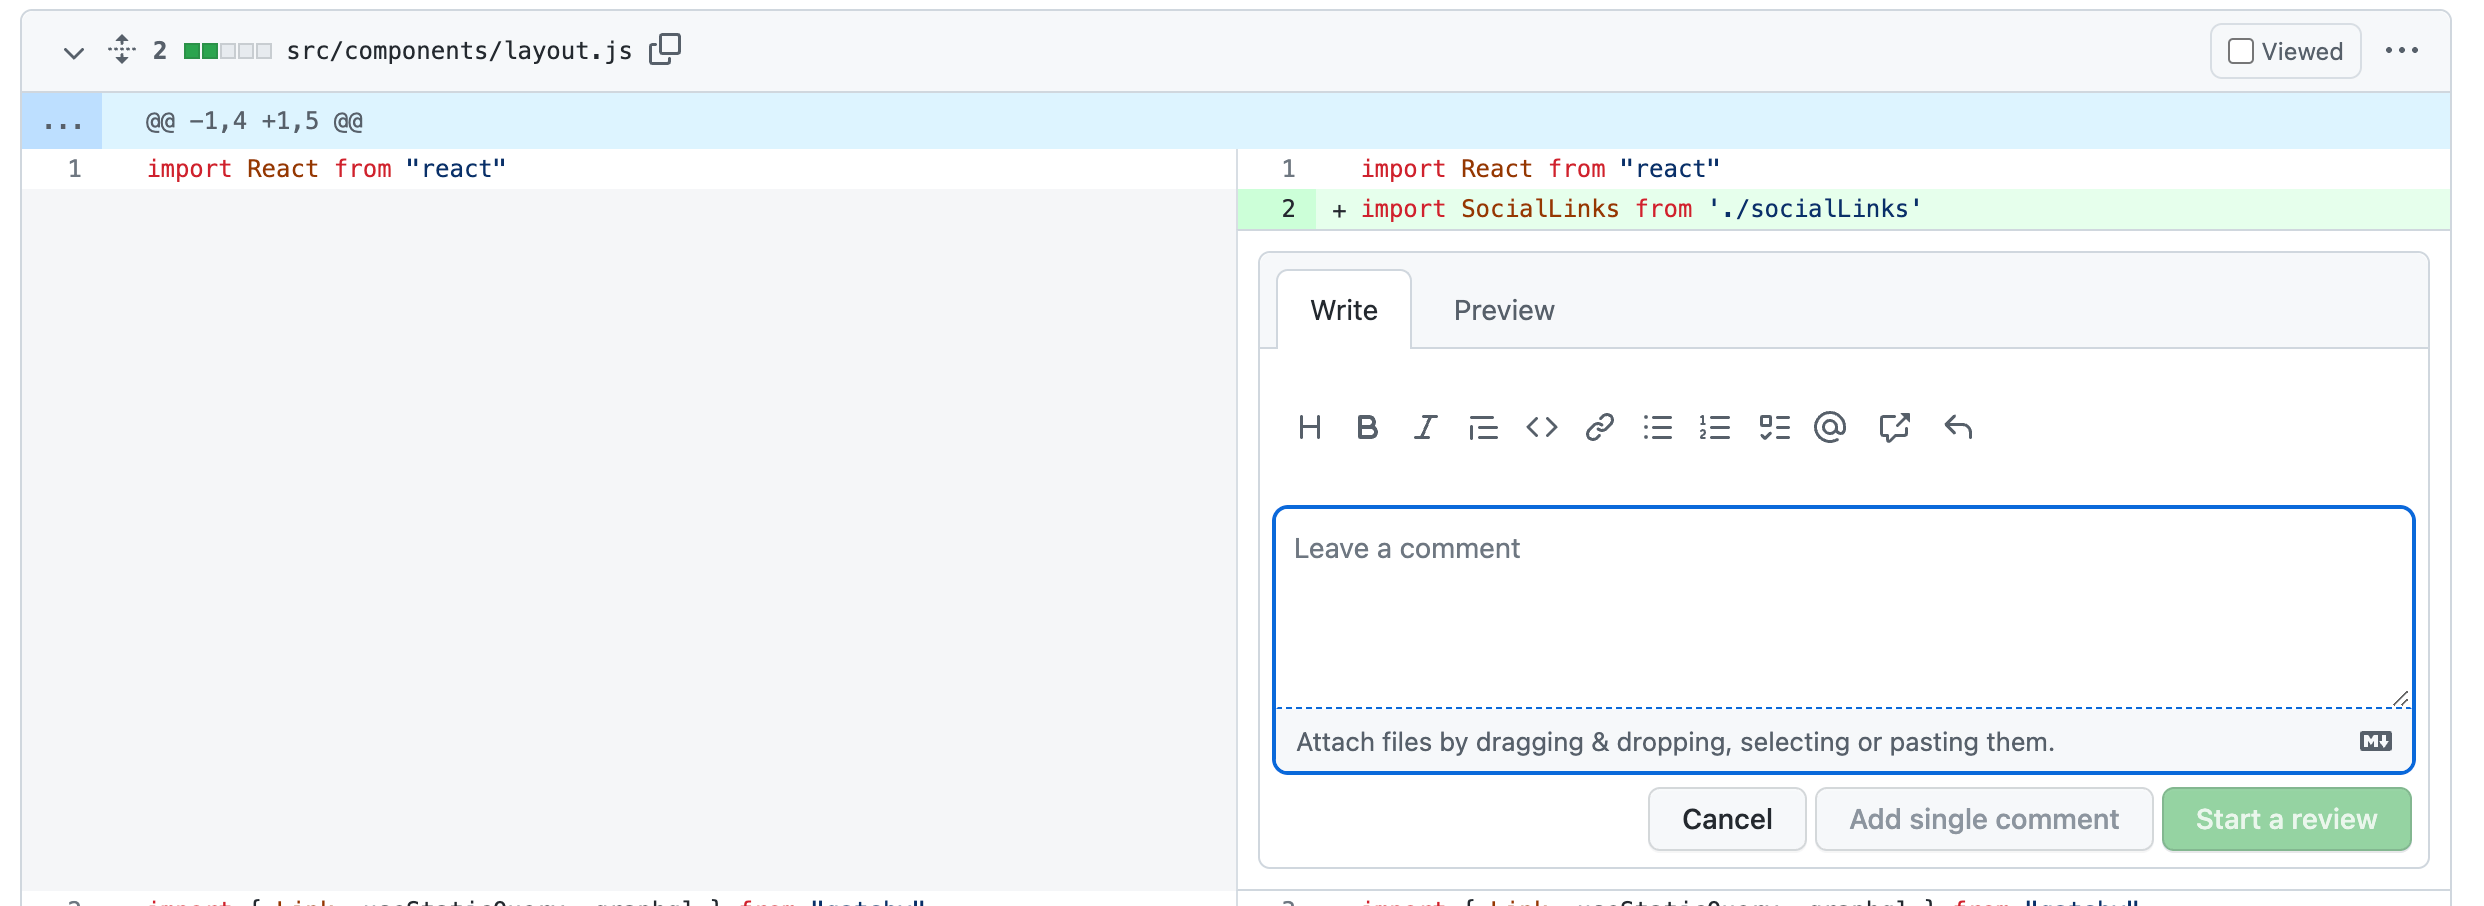
After creating the PR, you can view all the changes in a diff viewer that makes it easy to review the changes. You can also leave comments on the exact lines of code during the review. Someone from the team approves these changes or requests some changes after a code review.
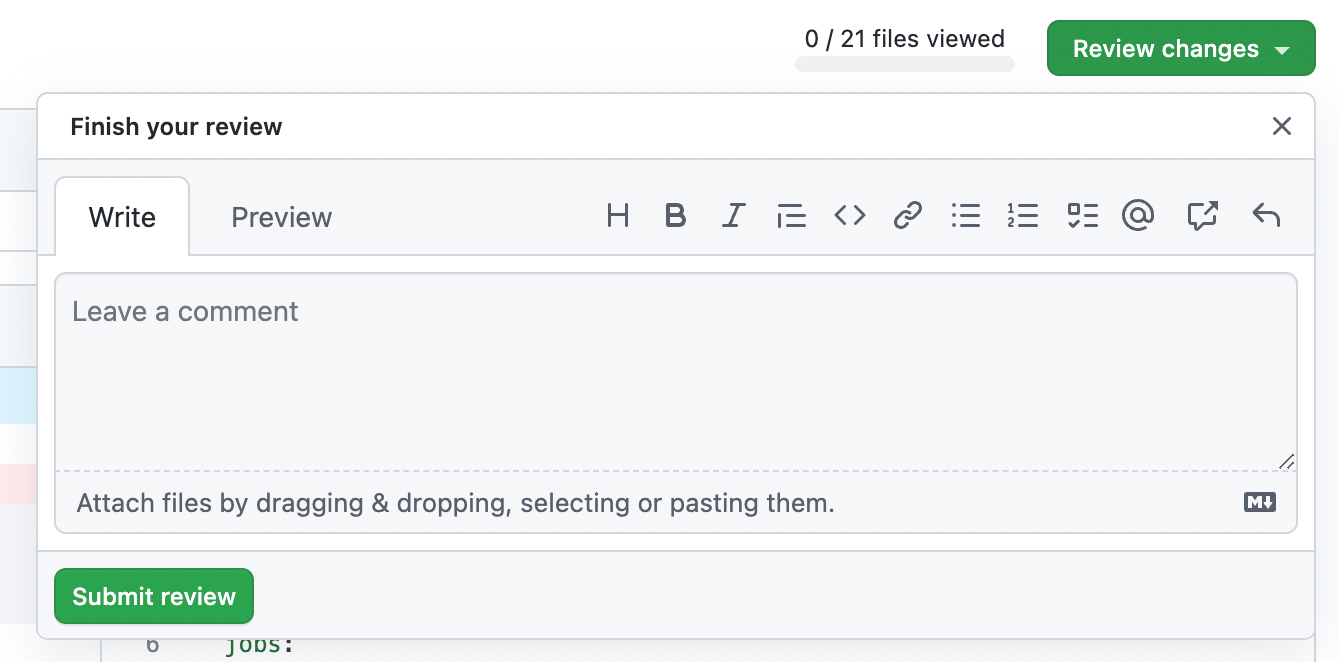
Once approved, you can merge your branch to main.